There’s something magical about a garden that twinkles with lights after dusk. The soft glow, the way the light dances off the foliage, and the ambiance it creates are truly enchanting. As an avid gardener and DIY enthusiast, I’ve found that adding garden lights to my outdoor space not only enhances its beauty but also extends the time I can enjoy it. Over the years, I’ve experimented with various designs and methods to create unique garden lights that reflect my personal style. In this comprehensive guide, I will share insights and expertise to help you illuminate your garden with charming, homemade lights.
Creating your own garden lights is an enjoyable and rewarding project. It allows for customization that can’t be matched by store-bought options. Whether you’re looking to create a cozy nook, light up a pathway, or highlight your favorite plants, the possibilities are endless. By the end of this article, you’ll be equipped with the knowledge to design and install garden lights that will transform your outdoor space into a nighttime wonderland.
Benefits of Creating Your Own Garden Lights
When you choose to embark on the journey of crafting your own garden lights, the benefits are numerous. Firstly, the customization aspect is unparalleled. You can select the colors, sizes, and styles that best fit your garden’s theme and your personal taste. Secondly, the sense of accomplishment that comes with completing a DIY project is incredibly satisfying. Watching the lights come to life as a result of your hard work is a feeling like no other.
Additionally, making your own garden lights can be cost-effective. By sourcing materials wisely and putting in a bit of elbow grease, you can achieve stunning results without breaking the bank. Furthermore, DIY projects like this can be an eco-friendly choice. You have the opportunity to repurpose materials and choose solar-powered options, reducing your environmental footprint.
Lastly, the process of designing and installing garden lights can be a wonderful learning experience. You’ll gain practical skills in areas such as electrical work, design, and landscaping. These skills not only serve you in this project but can be applied to future endeavors as well.
Types of Garden Lights to Consider
When you’re planning to brighten up your garden, it’s important to know the different types of lights available. Each serves a unique purpose and can contribute to the overall aesthetic in its own way. Path lights are a popular choice for illuminating walkways, ensuring safe passage through your garden after dark. Accent lights, on the other hand, are perfect for highlighting specific features such as trees, sculptures, or architectural elements.
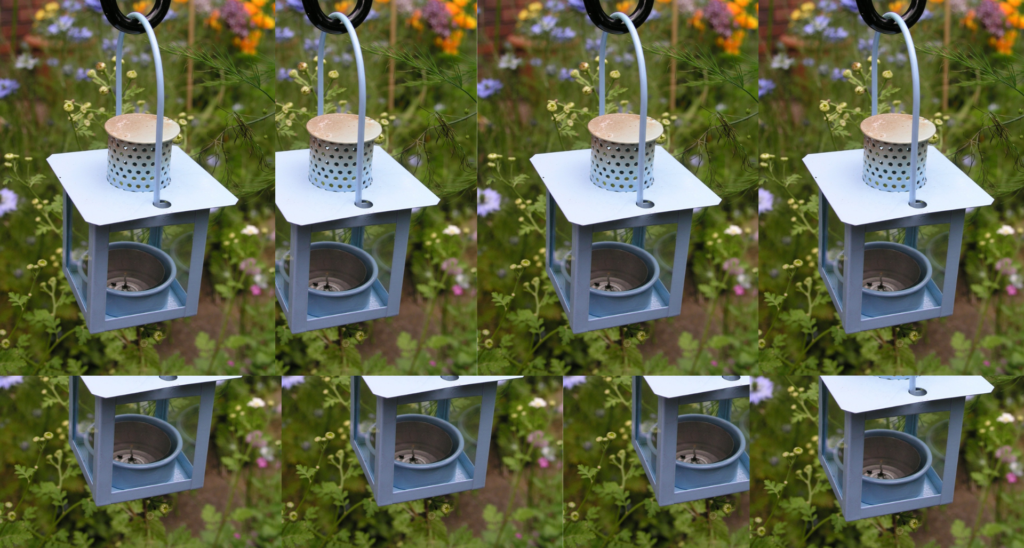
String lights have gained popularity for their versatility and whimsical appeal. They can be draped along fences, wrapped around trees, or hung overhead to create a canopy of stars. Lanterns offer a classic look and can be placed on the ground or hung from hooks to add a touch of elegance. For those interested in sustainability, solar-powered lights are an excellent option, harnessing the sun’s energy to provide a soft, ambient glow without any ongoing electricity costs.
Floodlights and spotlights are more intense lighting options that can be used to focus attention on a particular area or to provide security around your home. Deck lights and step lights are functional choices that ensure safety on stairs and platforms. Finally, in-ground lights can be recessed into the earth to provide a seamless and modern lighting effect.
Planning Your Garden Light Design
Before you begin creating your garden lights, it’s crucial to have a well-thought-out plan. Start by walking around your outdoor space during the day and considering where you’d like to add lighting. Visualize how each area would look under different lighting conditions and think about the mood you want to set. Do you want a serene, romantic atmosphere, or are you aiming for something more lively and festive?
Sketch a rough map of your garden and mark the spots where you’d like to place lights. Consider the practical aspects as well, such as where you’ll need the most visibility and which features you’d like to accentuate. Keep in mind the balance between light and shadow, as the contrast can add depth and intrigue to your space.
Once you have an idea of where your lights will go, it’s time to think about power sources. If you’re not using solar-powered lights, you’ll need to consider how to connect your lights to electricity. Plan the layout of wires and cables, ensuring they can be safely hidden or protected from the elements and garden activities. This stage is also the time to decide on the intensity and color of the lights, as these will greatly influence the ambiance of your garden.
Step-by-Step Guide to Creating Garden Lights
Creating your own garden lights can be a straightforward process if you follow these steps carefully. Let’s dive into the journey of turning your vision into reality.
Step 1: Gather Inspiration and Ideas
Before you start purchasing materials or assembling components, spend some time gathering inspiration. Look at garden magazines, browse online resources, and visit public gardens or neighborhoods in your area to see how others have implemented garden lighting. Take notes on what appeals to you and consider how you can adapt those ideas to fit your space.
Step 2: Design Your Lights
With inspiration in hand, begin designing your garden lights. Decide on the styles and shapes that will best complement your garden’s aesthetic. You might opt for sleek, modern fixtures or perhaps something more rustic and traditional. Think about the scale of the lights in relation to your garden’s size and the objects you want to illuminate.
Step 3: Source Your Materials
Once your designs are ready, it’s time to source the materials you’ll need. Visit hardware stores, craft shops, and even second-hand stores to find the components for your lights. Look for weather-resistant materials that can withstand outdoor conditions. For the eco-conscious, seek out recycled or upcycled materials to give your project an environmentally friendly touch.
Step 4: Assemble Your Lights
Now comes the fun part—putting everything together. Follow your design plans and assemble your lights with care. If you’re working with electrical components, make sure to follow safety guidelines and consider enlisting the help of a professional if you’re not confident in your electrical skills.
Step 5: Install Your Lights
With your garden lights assembled, it’s time to install them in your outdoor space. Place them according to your initial plan, adjusting as necessary to achieve the desired effect. If you’re using wired lights, lay the cables carefully and consider using protective casing or burying them to prevent accidents.
Step 6: Test and Adjust
After installation, wait for nightfall and turn on your lights. Walk around your garden to see how the lights perform. Make adjustments to the positioning or intensity as needed to ensure each area of your garden is showcased the way you envisioned.
Choosing the Right Materials for Your DIY Garden Lights
Selecting the proper materials for your garden lights is essential for both aesthetic and practical reasons. Opt for durable substances that can endure the elements, such as stainless steel, copper, or weather-treated woods. These materials not only last longer but also age gracefully, often developing a beautiful patina over time.
For the light elements, LED bulbs are a fantastic choice due to their longevity and energy efficiency. They come in a range of colors and brightness levels, so you can tailor your lighting to create the perfect mood. Additionally, consider using frosted or tinted glass to diffuse light softly and evenly throughout your garden.
When it comes to wiring and other electrical components, quality is key. Choose outdoor-rated wires and waterproof connectors to ensure safety and durability. For solar-powered lights, select high-quality solar panels and batteries to maximize the lights’ effectiveness and lifespan.
Safety Considerations for Outdoor Lighting Projects
Safety is paramount when undertaking any DIY project, especially one involving electricity. Always read and follow the manufacturer’s instructions for any electrical components you’re using. If you’re not experienced with electrical work, it’s wise to consult with or hire a professional electrician to oversee or assist with the installation.
When laying cables, make sure they’re properly insulated and protected from potential damage. Use outdoor-rated extension cords and avoid overloading circuits. Additionally, all outdoor electrical outlets should be equipped with Ground Fault Circuit Interrupter (GFCI) protection to prevent shocks.
Consider the placement of your lights to avoid tripping hazards and ensure they’re installed securely to prevent them from falling or being knocked over. Finally, if you’re using candles or any open flames in your lighting design, never leave them unattended and place them away from flammable materials.
Maintenance and Care for Your Garden Lights
To keep your garden lights shining brightly, regular maintenance is necessary. Clean the light covers and fixtures periodically to remove dirt, debris, or any buildup that could diminish their radiance. Check the bulbs and replace them as needed to ensure consistent lighting throughout your garden.
For solar-powered lights, it’s important to keep the solar panels clean and free of obstructions. This allows them to charge effectively during the day. Also, check the batteries periodically, as they may need to be replaced after a certain number of charge cycles.
Inspect the wiring and connections occasionally for any signs of wear or damage. Repair or replace any faulty parts promptly to avoid safety hazards. By dedicating a little time to the upkeep of your garden lights, you can ensure they remain a beautiful and functional part of your outdoor space for years to come.
Creative Ideas for Enhancing Your Garden Lights
Once your garden lights are installed, there are numerous ways to enhance them and add even more charm to your outdoor space. Consider using reflective surfaces like mirrors or gazing balls to amplify the light and create interesting visual effects. Planting flowers or foliage that glow under nighttime lighting can also add a magical touch to your garden.
Experiment with colored lights for special occasions or to highlight seasonal changes in your garden. Mixing and matching different types of lights can create depth and texture, making your garden appear more dynamic. You can also incorporate timers or smart lighting systems to control when and how your garden is illuminated, adding convenience and further customization to your lighting design.
Conclusion: Enjoy Your Illuminated Outdoor Space
Embarking on a DIY garden light project can be a delightful and fulfilling endeavor. It allows you to express your creativity, enhance the beauty of your outdoor space, and enjoy the fruits of your labor with a stunningly illuminated garden. By following this step-by-step guide and paying attention to safety, material selection, and maintenance, you can create a garden lighting scheme that is both captivating and enduring.
As you sit back and take in the view of your twinkling garden, you can take pride in knowing that your efforts have not only increased the aesthetic appeal of your space but also extended the hours you can spend enjoying the great outdoors. So go ahead, invite friends and family over, or simply relax in your private oasis of light and nature. Your DIY garden lights are sure to be a topic of conversation and a source of joy for many evenings to come.
Remember, the journey doesn’t end here. As seasons change and your garden grows, there will always be new opportunities to adjust and add to your lighting design. The world of DIY garden lights is as vast and varied as your imagination allows it to be. Enjoy your illuminated outdoor space to the fullest, and let your garden light shine bright.