As someone who loves spending time in their garden, I’ve always looked for ways to enhance its beauty and functionality. One of the most transformative additions I’ve made is installing garden lights. They are not only practical, providing visibility at night, but also add an enchanting ambiance that can make any outdoor space feel magical. In this article, I’ll share with you the insights I’ve gained on how to install garden lights, turning your garden into a luminous sanctuary.
Garden lighting can serve multiple purposes, from highlighting your favorite plants and garden features to ensuring safety along walkways. The gentle glow of outdoor lights can create an inviting atmosphere, perfect for evening gatherings or a quiet night enjoying the outdoors. But beyond aesthetics, garden lights can also deter intruders and prevent accidents by illuminating paths and obstacles.
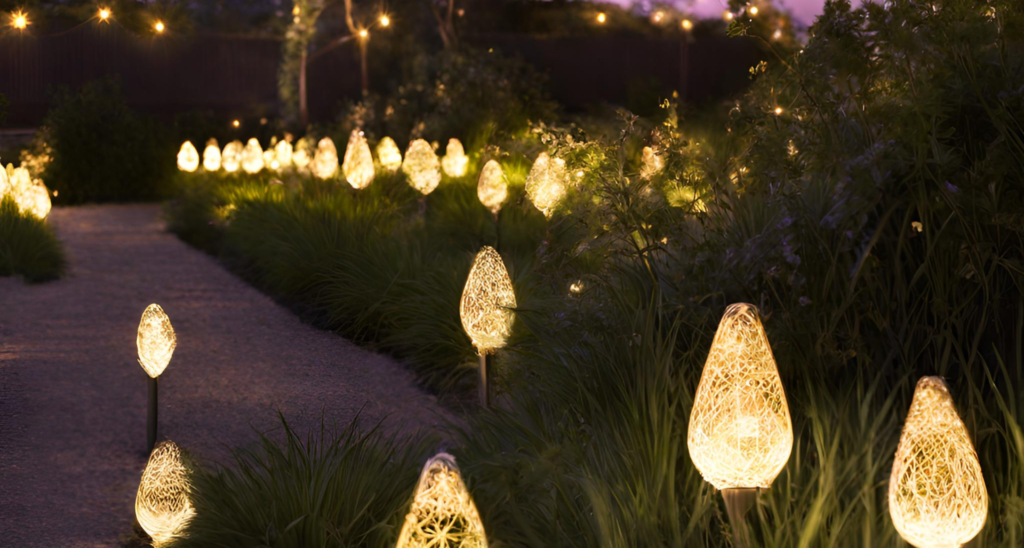
Before we dive into the intricacies of how to install outdoor garden lights, let’s take a moment to appreciate the transformative power of these fixtures. They are not merely tools to extend the usability of your garden into the evening hours; they are also the paintbrushes with which you can cast your garden in a whole new light—literally. Now, let’s illuminate the path to your garden’s transformation.
Benefits of installing garden lights
The idea of installing garden lights might seem like a mere cosmetic upgrade at first glance, but there’s much more to it. The benefits of installing garden lights are numerous, and they extend well beyond the visual enhancement of your outdoor space. Firstly, garden lights can increase the safety of your property. Well-lit pathways reduce the risk of tripping and falling, making it safer to navigate your garden at night.
Another benefit is the extension of your living space. With garden lights, the functionality of your outdoor area is not limited by the setting sun. It becomes a place where you can relax or entertain guests, even after dark. This extension of usable space effectively adds another ‘room’ to your home, which can be especially valuable during social gatherings.
Moreover, garden lights can enhance the security of your home. A well-lit exterior is a known deterrent to potential intruders. It increases visibility, which makes it harder for anyone to approach your home unnoticed. By strategically placing lights around your property, you can create a sense of security that benefits everyone in your household.
Types of garden lights to consider
When planning how to install garden lights, understanding the different types available is crucial. Firstly, there are solar garden lights, which are energy-efficient and easy to install since they do not require wiring. They harness sunlight during the day to power the lights at night, making them an environmentally friendly option.
Another type to consider is LED garden lights. These are known for their longevity and low energy consumption. LED lights come in various colors and brightness levels, allowing for customization to fit the mood or style you desire for your garden. They are also durable, making them suitable for outdoor conditions.
For a more traditional look, you may opt for incandescent garden lights. These provide a warm glow that can create a cozy atmosphere in your garden. However, they tend to use more energy and have a shorter lifespan compared to LED lights. It’s important to weigh the aesthetic appeal against the operational costs and environmental impact when choosing the type of lighting that best suits your needs.
Planning your garden lighting design
Before you start the installation, planning your garden lighting design is a critical step. This involves more than just deciding where to place the lights; it’s about creating a lighting plan that enhances the best features of your garden while providing the functionality you need. Start by walking through your garden at night and noting which areas could benefit from illumination, such as pathways, seating areas, or focal points like statues or water features.
Consider the type of ambiance you want to create. Do you prefer a soft, romantic glow or a bright, lively atmosphere? Different areas of your garden may require different types of lighting. Accent lighting can highlight specific features, while ambient lighting can create a general sense of warmth and welcome throughout the space.
Draw a sketch of your garden and mark the locations where you want to place the lights. Take note of the power sources available and the amount of sunlight each area receives if you’re considering solar lights. It’s also essential to think about the practical aspects, such as how you’ll run cables without creating trip hazards and how each light will be maintained. A well-thought-out plan will save you time and effort during the installation process.
Gathering the necessary tools and materials
Once your garden lighting design is in place, it’s time to gather the necessary tools and materials. Depending on the type of lights you’ve chosen, the list may vary, but there are standard tools you’ll need for most installations. These include a shovel or garden spade for digging trenches, wire cutters and strippers for electrical cables, a drill with various bits for mounting fixtures, and a screwdriver set.
You’ll also need the actual lighting fixtures, cables or wiring appropriate for outdoor use, and any connectors or transformers specified for your lighting system. If you’re using solar lights, ensure you have all the components, such as solar panels and batteries. Don’t forget personal protective equipment like gloves and safety glasses to protect yourself during the installation process.
It’s also wise to have a multimeter handy to check connections and voltage levels, ensuring everything is functioning correctly before finalizing your installation. With your tools and materials prepared, you’re one step closer to bringing your garden lighting design to life.
Preparing your garden for installation
Before you can enjoy the glow of your new garden lights, you need to prepare your garden for installation. This means clearing the areas where you’ll be placing the lights, removing any debris or obstacles that could interfere with the installation process. If you’re burying cables, mark the route with spray paint or flags to avoid confusion and ensure a clean line for your trenches.
Next, consider the condition of your garden’s soil. If it’s particularly hard or rocky, you might need to water the area or use specialized tools to make digging easier. Be mindful of existing plants and roots; the last thing you want is to damage your garden’s ecosystem while trying to enhance it.
Also, take this time to ensure that any existing outdoor electrical outlets are in good condition and are suitable for outdoor use. If you’re not familiar with electrical systems, it might be wise to consult with a professional electrician to ensure everything is up to code and safe for outdoor applications.
Step-by-step guide on installing garden lights
Now, let’s delve into the heart of how to install garden lights. This step-by-step guide will help you through the process, ensuring a smooth and successful installation. First, lay out all your lights, cables, and accessories according to your design plan. This will give you a clear overview of the installation and help you spot any potential issues before they arise.
Begin by installing any transformers or control units required for your lighting system. These are usually placed close to your power source and should be installed according to the manufacturer’s instructions. Make sure they’re securely mounted and protected from the elements.
Next, dig the trenches for your cables. The depth will depend on local regulations, but generally, it should be deep enough to protect the cables from being accidentally cut or damaged. Lay the cables in the trenches, avoiding any sharp bends or kinks that could damage the wiring. Once the cables are laid out, gently cover them with soil and tamp down to secure them in place.
Install your light fixtures according to your plan, connecting them to the cables as you go. If you’re using solar lights, make sure the solar panels are positioned to receive maximum sunlight. For each fixture, ensure it is securely anchored in the ground or mounted to a solid surface to prevent it from being knocked over or shifting out of position.
Once all the fixtures are installed, connect them to your power source and test the system. Turn on the lights to make sure every light is working and positioned as desired. Make any necessary adjustments to the direction or angle of the lights to achieve the perfect illumination for your garden.
Finally, conceal any visible cables or hardware to maintain the aesthetic appeal of your garden. This could involve burying cables deeper, using cable covers, or strategically placing plants and other garden elements to hide them from view.
Troubleshooting common issues with garden lights
After installing your garden lights, you may encounter some common issues that require troubleshooting. Perhaps the most frequent problem is lights not turning on. This could be due to a range of causes, from simple ones like a switch being off or a bulb being burnt out, to more complex issues like a tripped circuit breaker or a faulty transformer.
If you’re faced with lights that aren’t working, start by checking the power source and making sure all switches are in the ‘on’ position. Next, inspect the bulbs or LED units for any visible damage and replace them if necessary. If the problem persists, use a multimeter to check for continuity and ensure there’s power reaching the fixtures.
Another issue you might face is flickering lights. This can be caused by loose connections, so check all cable connections to ensure they’re tight and secure. If the flickering continues, it may indicate a problem with the voltage, which could require adjusting the transformer or replacing it if it’s defective.
For solar lights, common issues include dim lighting or lights that don’t last through the night. This is often due to the solar panels not receiving enough sunlight during the day. Make sure the panels are clean, unobstructed, and positioned to capture maximum sunlight. If the problem is persistent, the batteries may have reached the end of their lifespan and need replacing.
Maintaining and caring for your garden lights
To ensure your garden lights continue to illuminate your outdoor space beautifully, regular maintenance and care are essential. Start by regularly cleaning the light fixtures and solar panels. Dust, dirt, and debris can accumulate on these surfaces, reducing their effectiveness and dimming the light output. Use a soft cloth and, if necessary, a mild detergent to clean them without causing damage.
Periodically check the fixtures and wiring for any signs of wear or damage. Outdoor lighting is exposed to the elements, so it’s not uncommon for fixtures to become weathered or for wires to degrade over time. Addressing these issues promptly can prevent more significant problems down the line.
Additionally, it’s a good idea to inspect the lights’ positioning every so often. Natural elements like wind, rain, or even the growth of plants can alter the direction or angle of your lights. Adjust them as needed to maintain the desired lighting effect and ensure your garden is showcased as intended.
Safety tips for outdoor lighting installations
Safety should always be a top priority when dealing with electrical installations, especially outdoors. Firstly, always make sure you are working with a de-energized circuit before you begin any installation or maintenance work. Turn off the power at the circuit breaker to prevent the risk of electric shock.
When digging trenches for cables, be aware of any underground utilities that might be present. Call your local utility companies to mark any underground lines before you start digging to avoid a dangerous and costly mistake.
Use outdoor-rated cables and fixtures that are designed to withstand the elements. These will be more durable and safer for use in an outdoor environment. Additionally, all connections should be made with weatherproof wire nuts and enclosures to protect against moisture and corrosion.
Lastly, if you’re not confident in your electrical skills or if the installation is particularly complex, don’t hesitate to hire a professional electrician. They can ensure that the installation is done safely and to code, giving you peace of mind and preventing potential hazards.
Conclusion
Installing garden lights can transform your outdoor space into a nighttime oasis full of ambiance and beauty. Whether you’re looking to enhance the safety of your property, extend your living space, or simply enjoy the aesthetic appeal of a well-lit garden, following this step-by-step guide will help you achieve your goal. Remember to plan your design carefully, gather the right tools and materials, and proceed with the installation with safety in mind.
Regular maintenance and troubleshooting are part of the process, but the rewards of a beautifully illuminated garden are well worth the effort. With a bit of patience and attention to detail, you can bring your garden to life after sunset.
If you’ve found this guide helpful and are ready to embark on your garden lighting project, or if you’re looking for more tips and advice on enhancing your outdoor living space, don’t hesitate to reach out. We’re here to help you every step of the way, from planning to installation to maintenance. Let’s light up your garden together!